


This past Friday’s bake was macarons! It went a lot smoother than the first time I made them and they turned out just as pretty too. They also disappeared just as fast. It’s such a shame I can only make about 25 of these at a time. I think my family might be macaron addicts now.
I didn’t take a lot of pictures the first time I made macarons because my household was crazy that day. This past Friday though was a day off from homeschool so in the morning, I took my time making macarons and taking pictures! This blog post will have a LOT of pictures.
Since the recipe I used the first time worked well for me, I decided to stick with that recipe. I still have Baking Chez Moi around because I am so reluctant to return it to the library! So I just keep renewing it and renewing it. I’m glad that no one else has wanted to borrow it! I think I will eventually be buying this cookbook.
If you want to take a look at the recipe I used, it is here.


This might be the most tedious part of making macarons. Drawing out the circles and spacing them so that they are 2 inches apart. If I start making macarons regularly, I will probably be investing in some reusable silpat just for macarons.


For some reason, I find weighing my ingredients fun! Must be the numbers girl in me. 200 grams of almond flour and 200 grams of confectioner’s sugar equals 400 grams.


This is how I sifted the almond flour and confectioner’s sugar. Pushing the mixture through a sieve using a spoon.


Oops! I was off by 1 gram on my white sugar for the sugar syrup.


This time, I decided that it would be nice to color my macarons a light pink, since I was using a raspberry jam for the filling for half of them. This is about 75 ml of egg whites with 6 drops of red and 1 drop of blue. The other 75 ml of egg whites went in the stand mixer bowl to be turned into Italian meringue.


Mashing the egg white/food coloring mixture into the almond flour/confectioner’s sugar mixture and watching the color change was neat. Guess there will always be a little bit of kid in me! The color of the batter at this point is pretty dark but it lightens up once the Italian meringue is added.


This is probably the trickiest part of making Italian meringue. Timing whipping the egg whites to medium firm peaks to the same time that the sugar syrup gets up to 245 degrees Fahrenheit. I did not try to hold the bowl over my head to see if the meringue was firm enough. I’m not brave enough to try that yet!


Here is the meringue after 10 minutes of whipping with the sugar syrup. Honestly, I could probably have eaten this whole bowl by myself. I satisfied myself with licking the beaters, the spatula, and um… yes, the bowl too. No, I didn’t share with my kids. Someday, I am going to use Italian meringue in a cake frosting and probably have a fight with my husband over the bowl.


Another fun part! Mashing the Italian meringue into the almond flour mixture.


This was a bit of a tricky part for me. I could not remember what the batter was supposed to look like once it was ready to be piped. I did remember that it was supposed to drop like lava off of the spatula in a V-shape. I just couldn’t remember if it was supposed to be this grainy-looking. I was a little worried that I had ruined the texture, but once they were piped out, the texture looked fine.


My “piping bag.” This is a decorating tool from Wilton. This was a lot neater for me to use than a pastry bag. Not as much wasted batter.

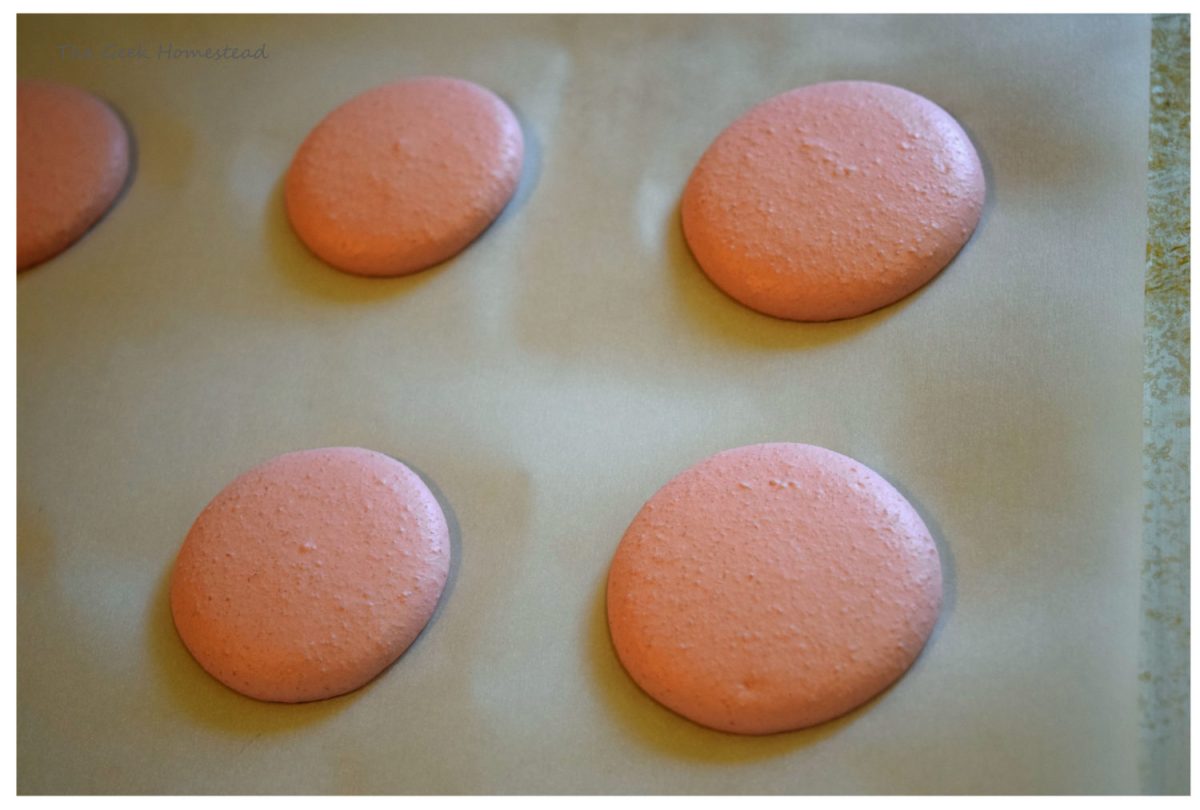
This is the way the batter is supposed to look after piping. Nice and smooth.

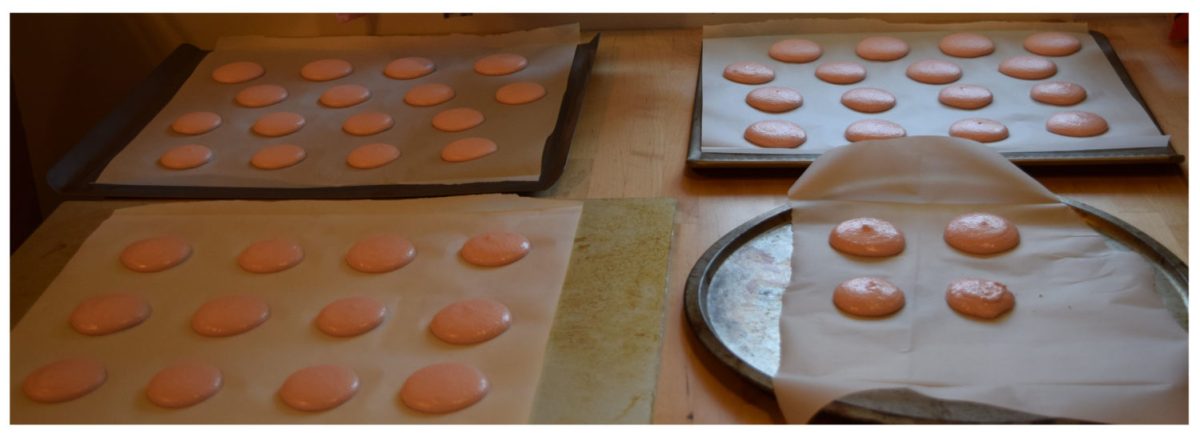
4 pans of macaron shells and it still didn’t seem like enough! Some of them ended up bigger than others. I let the pans sit for about 30 minutes to form a crust. Once I could touch the tops of the shells without having any batter stick to my finger, they were ready to go in the oven.


I love watching these cuties bake! 6 minutes at 350 degrees, rotate the pan, and then bake for another 6 minutes.


I made a white chocolate ganache to fill half of the macarons. I mixed in some mini chocolate chips once it was cool just so that I could tell Josh I had tried to make a chocolate chip filling. I had said earlier in the day that I was going to make chocolate chip cookies. Nope, I ended up making macarons instead! The ganache was too liquidy to use right away so I put it in the fridge to thicken up enough to use as a filling.

Here are the raspberry jam macarons. I used some jam from one of our favorite orchards back east, Catoctin Mountain Orchard in Maryland. They used to have an online store but that doesn’t seem to be up right now.
The macarons turned out so pretty! I couldn’t resist trying one right away, but macarons really do need a day or two in the fridge before serving. The difference in texture between the interior and exterior becomes more defined. It is definitely worth the wait!
-Lynn