I’ve posted before about making my own ricotta cheese as well as making mascarpone from scratch, and both were a lot easier to make than I was expecting! I started researching other cheeses that I could make at home and found New England Cheese Making Supply Company to be a great resource. They had good prices on supplies so I decided to take the leap and order the ingredients to make my own yogurt, cream cheese, mozzarella, and creme fraiche.
I’ve made my own yogurt before using storebought yogurt as a starter, but the texture never seemed quite right to me. Also, one of my kids refused to eat it because it “felt weird,” so I thought I’d buy a yogurt starter and see if the texture would agree with him more. I’ve always wanted to try making mozzarella but rennet is just not something I had on hand. I’ve read a lot about creme fraiche and wanted to make that also so that I can compare it to sour cream.
What I ended up making first with my new cheesemaking supplies though was cream cheese! It was so easy that I definitely need to make it again. I think my oldest son liked it because he’s already asked me when I’m going to.
With my order from New England Cheese Making Supply Company, I also received a free printable e-book with cheese recipes. I was so glad to have this as a resource and used their recipe for cream cheese. I think I might need to make up a cheese recipe binder because there are a few cheese recipes from other homesteading blogs that I want to try!
Here is a quick list of what ingredients you will need:
- 1 gallon of whole milk (I think I ended up using 2% instead. I was trying to use up milk we had in our fridge. For a few weeks, we were overrun by milk.)
- 1 pint of heavy cream
- Calcium Chloride
- Liquid Rennet (I used vegetable)
- 1 packet of C21 buttermilk culture
- Salt
- 1/4 cup non-chlorinated water (we have well water)
First, I started off by heating my milk and cream in a large stainless steel pot. I probably should have used a bigger pot.
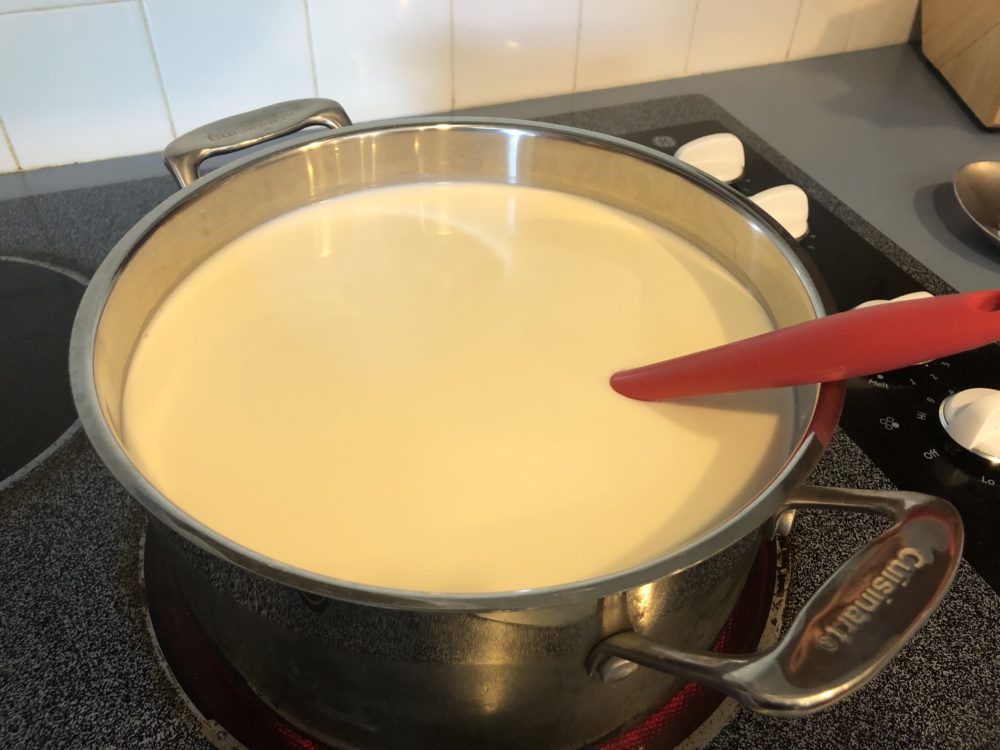
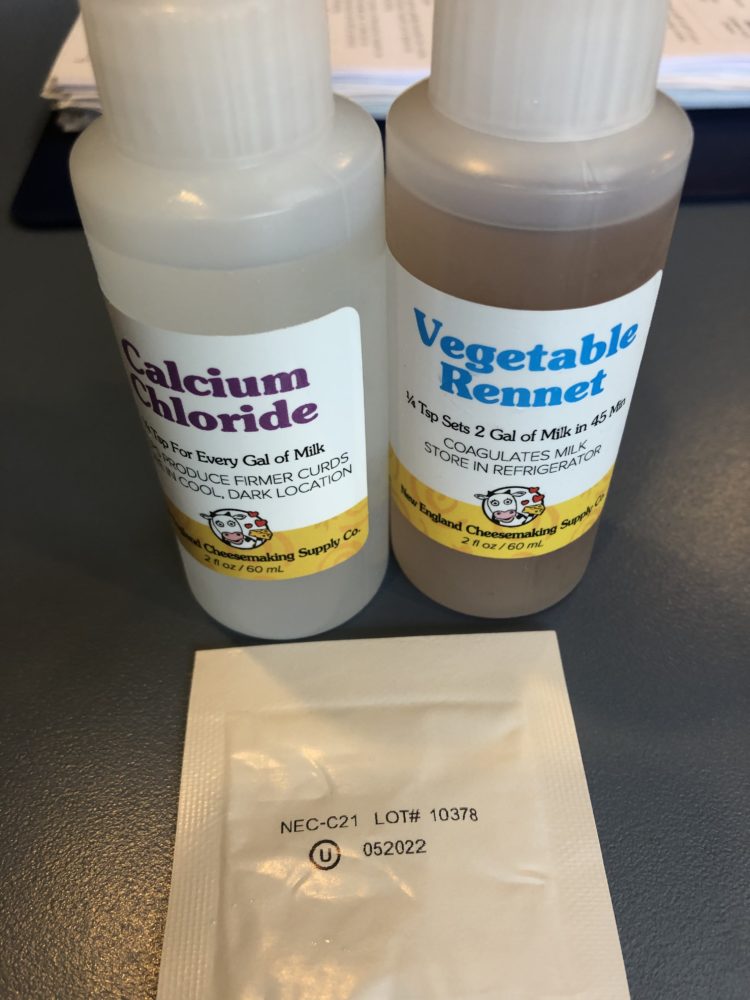
I mixed 1/4 tsp of calcium chloride with 1/4 cup of water and added the mixture to the pot while the milk and cream were heating up.
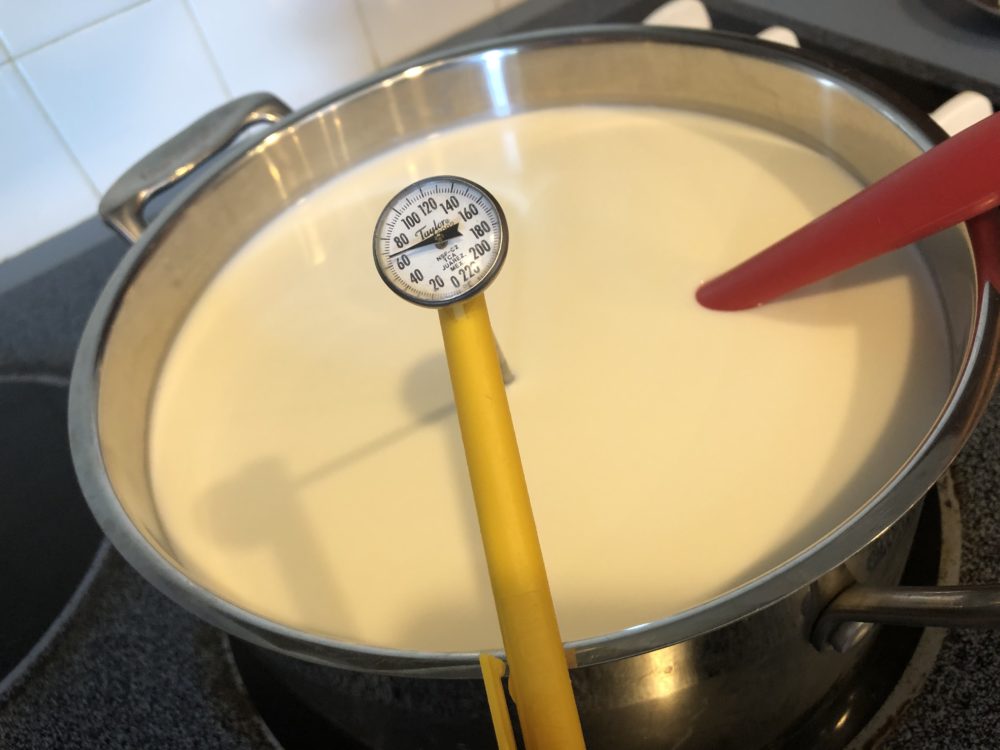
I usually use my candy thermometer for heating milk but it doesn’t read lower than 100 degrees F, so I had to use our meat thermometer instead. I would not suggest this since it is very hard to read 86 degrees F on this small of a dial. I ended up going over 86 degrees and up to 90-95 degrees. I don’t think I hurt my cream cheese with the higher temperature, but I would have liked to have kept it at the right temp. Once the milk reached temp, I sprinkled the packet of buttermilk culture on top of the hot milk and let it sit for 2 minutes before mixing it in.
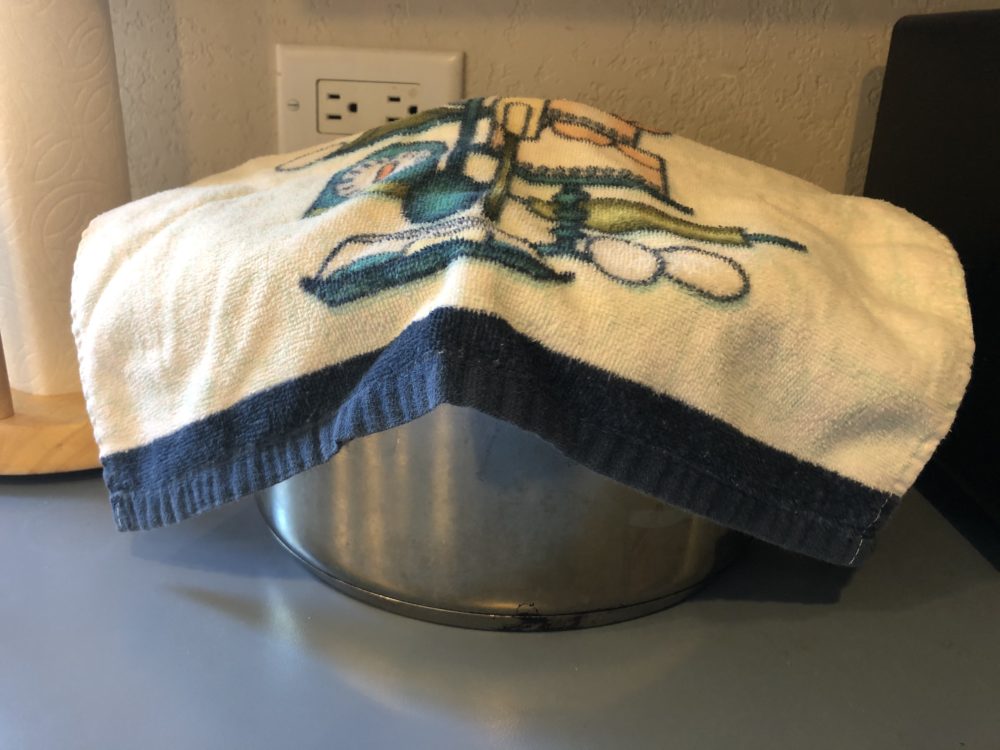
After taking the pot off heat, I set the pot on the counter where I knew it wouldn’t be disturbed, added 4 drops of vegetable rennet mixed with 1/4 cup of water to the milk mixture, and mixed everything together with a spatula in an up and down motion instead of using a swirling or side to side motion. Then, I put a lid on the pot and a towel over the lid and left it alone for about 22 hours. I did cheat and look at the cream cheese a few times but did not stir it.


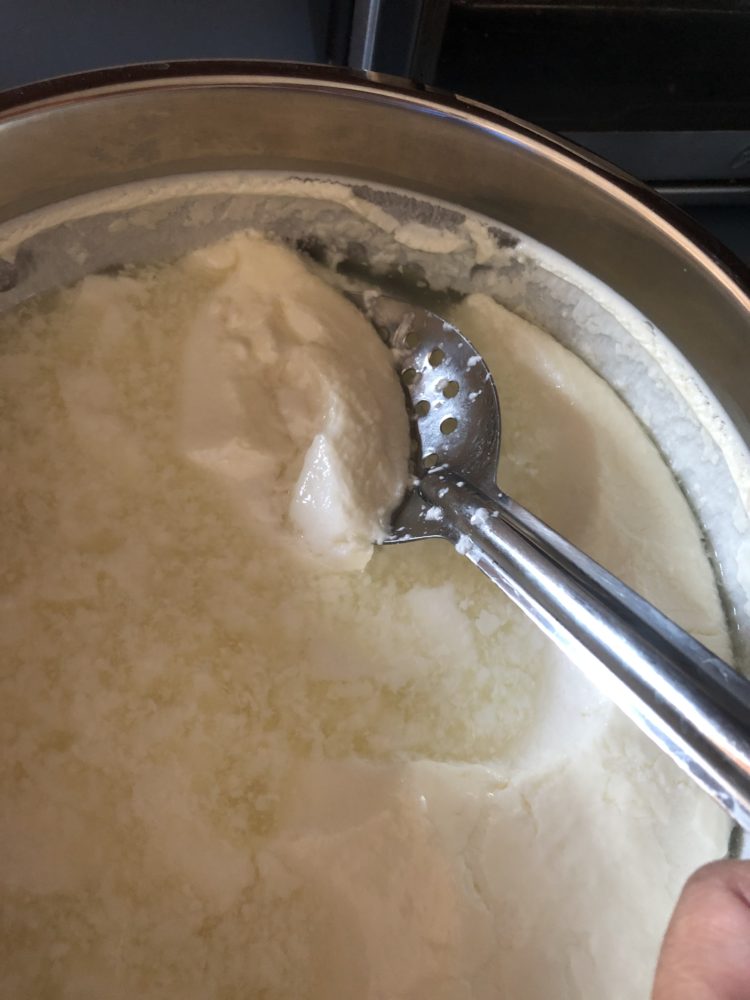
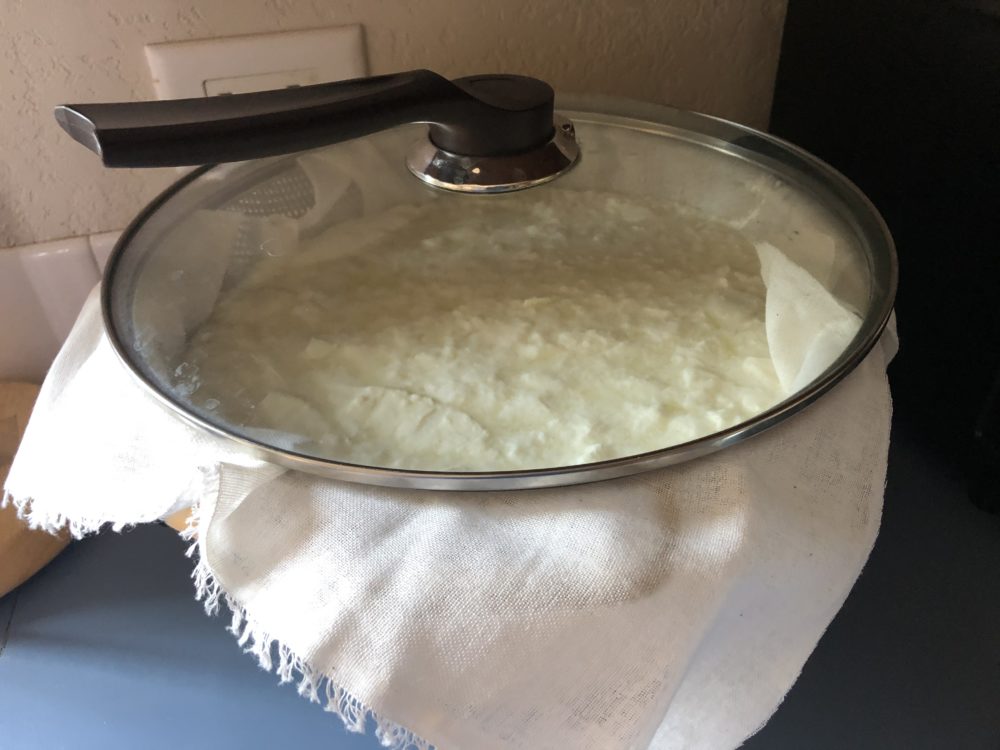
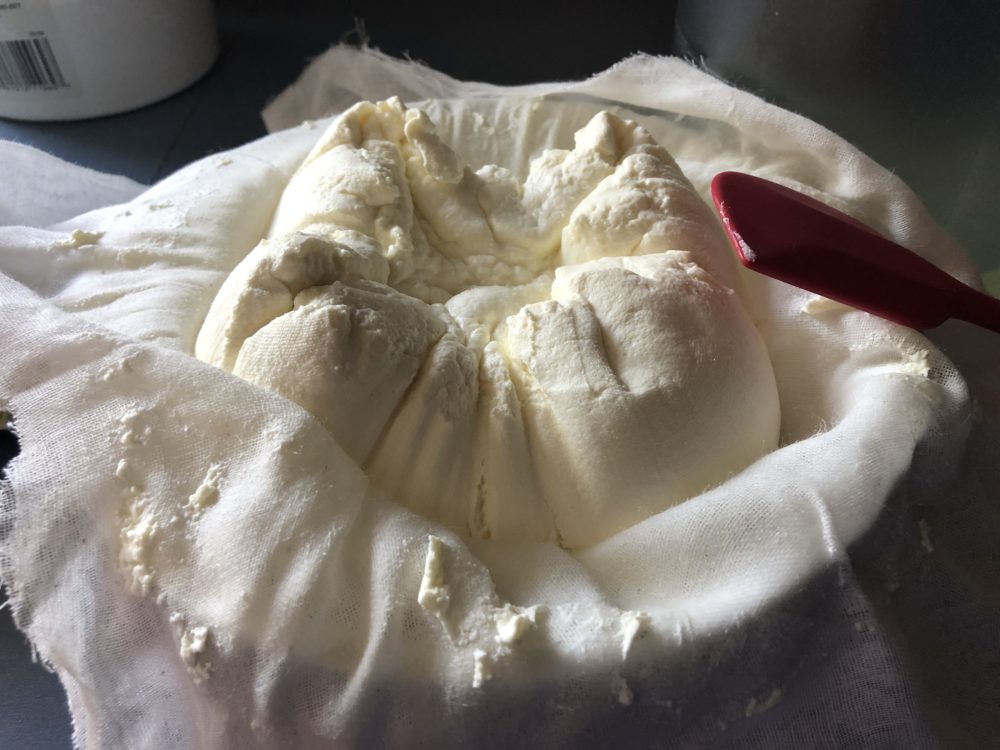
The next step is to drain the curds. I used a mesh colander lined with cheesecloth over a large bowl. I did not sanitize my equipment (pot, cheesecloth, colander, slotted spoon, thermometer, etc.) beforehand, but I probably should have. Next time, I will definitely sterilize everything.
I scooped the curds out as gently as possible to keep them in larger pieces. Then the colander and bowl went back to the counter to drain for a couple of hours.
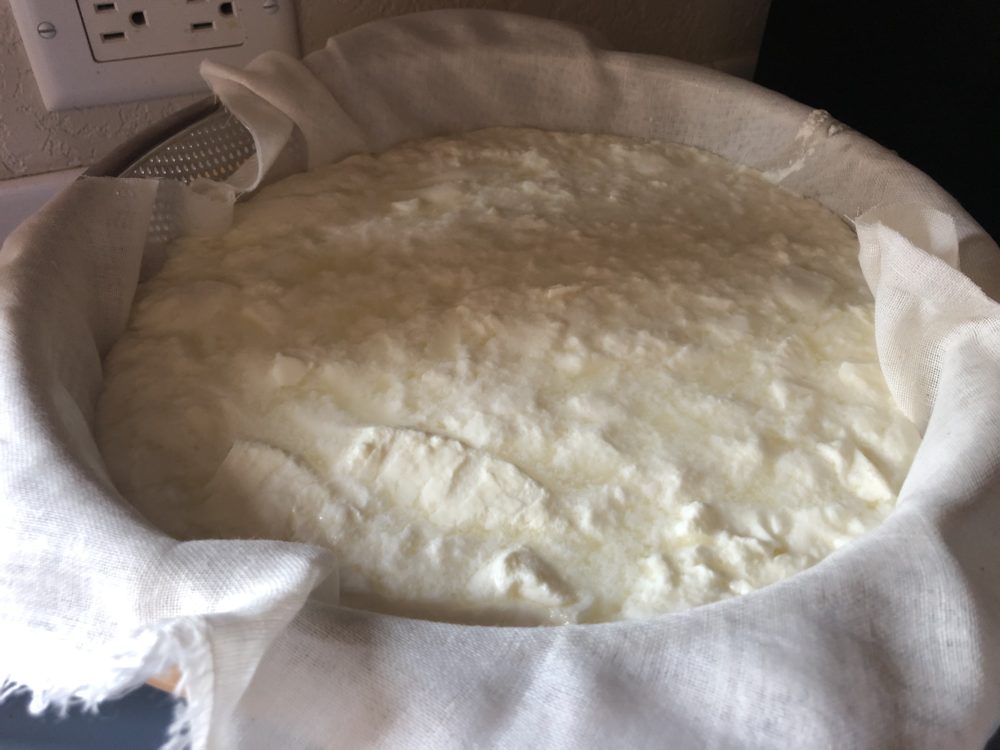
I covered the curds with a pot lid. Our kitten, Mitzi, LOVES dairy (butter, ice cream, milk, cream cheese) and I knew I might find her on the counter with her face in the cream cheese if I didn’t cover it!
I know I said that making cream cheese is easy. It doesn’t seem like it is from all these steps I’m posting about, but a lot of it is just waiting time really. It’s easy but takes time and patience.

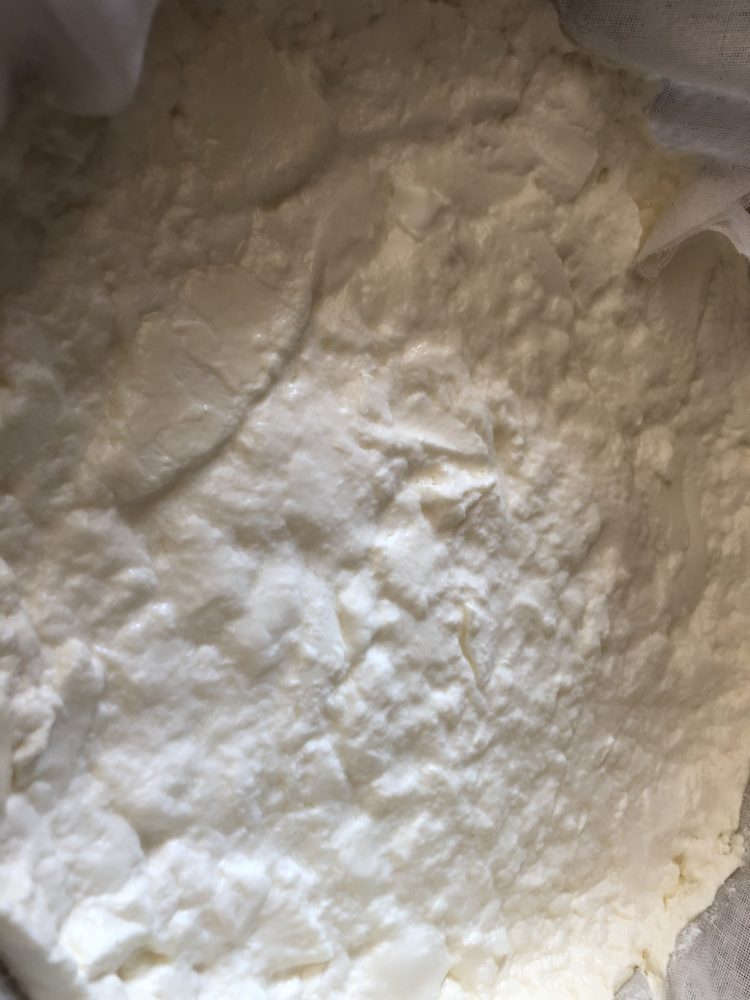
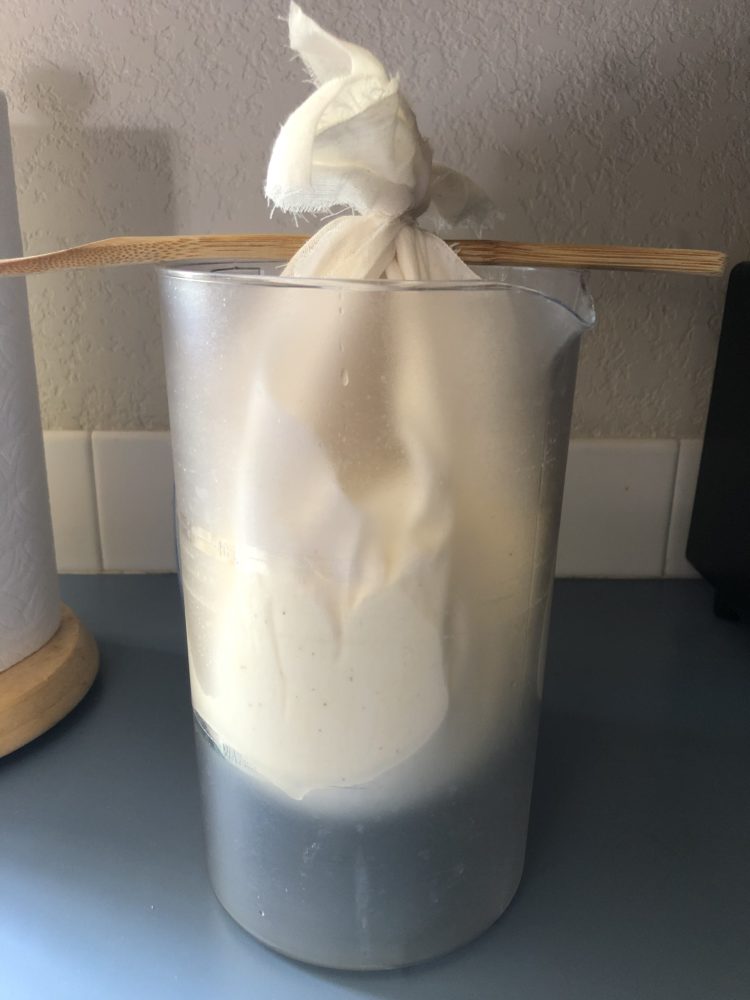
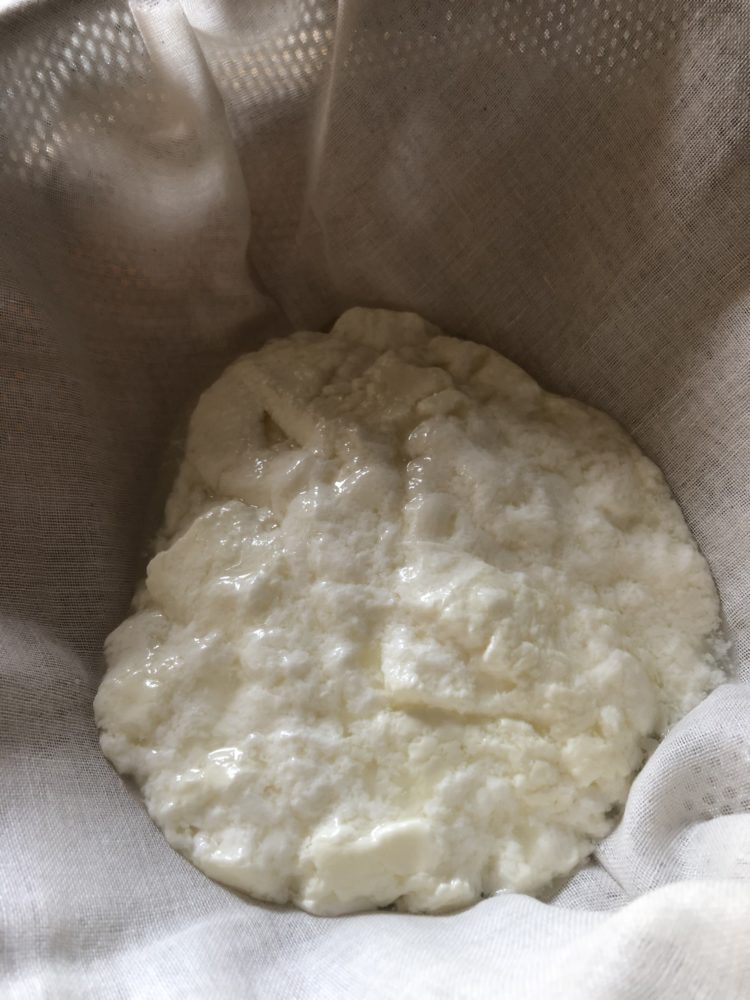
After two hours, I moved the cheesecloth bundle of cream cheese to drain into a pitcher. Wooden spoons make great hanging rods! The cream cheese is supposed to drain for another 10-20 hours at room temperature. It’s the middle of summer here so our kitchen was probably around 80 to 84 degrees F. Because it was so warm in our kitchen, the cream cheese only needed about 10 hours to reach the texture I wanted. Every 3 hours, I opened up the cheesecloth bundle to give the cream cheese a stir.
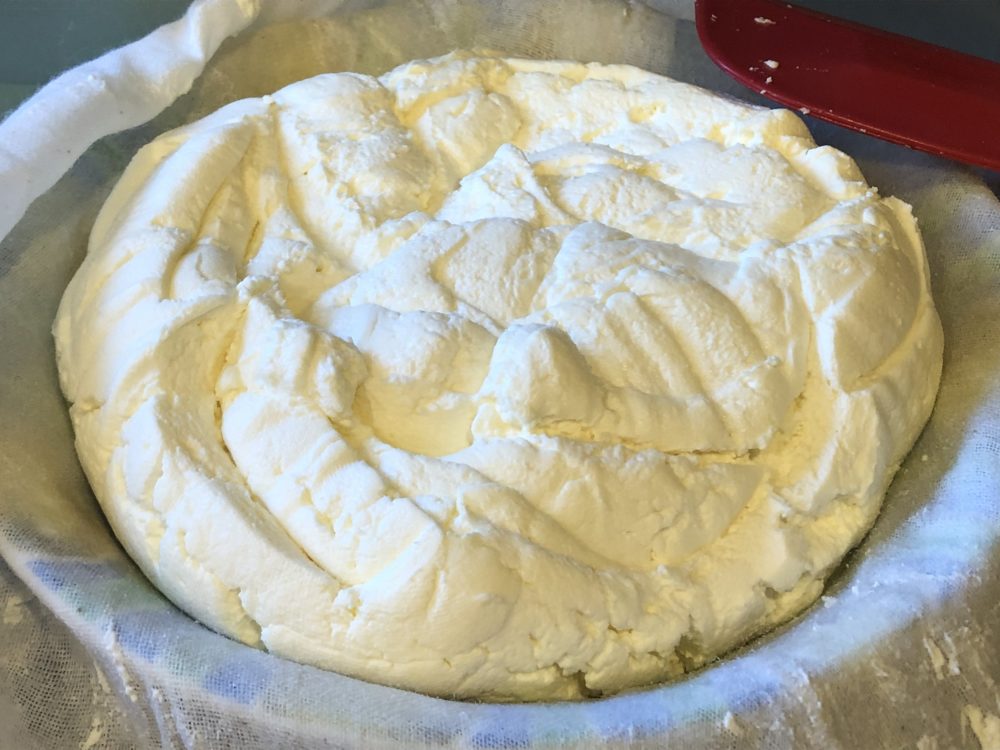
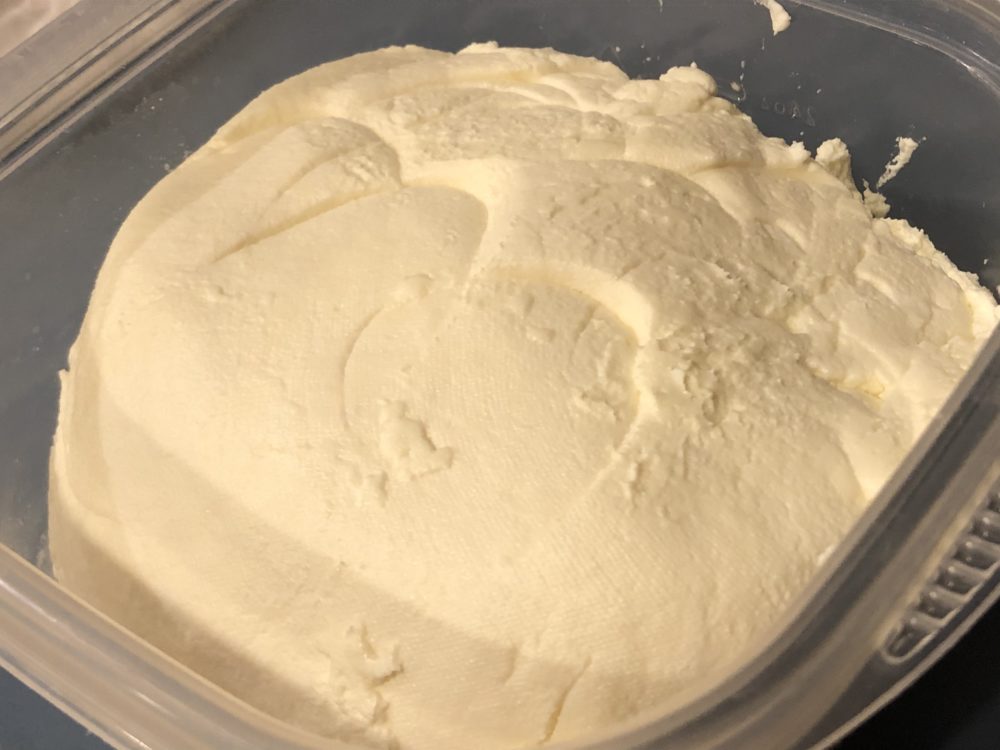
After almost 10 hours (9 PM at night), I decided the cream cheese was finished and put it away into a container to go into the fridge. I made the mistake though of using cheesecloth with frayed edges and when I moved the cream cheese into the container, some threads of cheesecloth ended up stuck to my cream cheese! I was not happy about that at all. I probably should have just left the cream cheese in the cloth and put the whole thing in the container that way.
The cream cheese was very tasty and was great on bagels, toast, and anything else I could find to put it on. Those loose threads that I mentioned were very disappointing though. I hated finding those in my cream cheese that I had spent two days working on. At least I know for next time!

-Lynn
[adinserter block=”5″]